Smoked Corned Beef Brisket… Pastrami!!!

Smoked Corned Beef Brisket... Pastrami Meal!!!!

Smoked Corned Beef Brisket… Pastrami Meal!!!!

Pastrami is made by smoking a cut of meat after in has been “corned”. This can be done to most any cut of meat but beef brisket is used very often. The recipe below uses store bought corned beef brisket flats, instead of the fattier points. 

TIP: The strength and flavor of the brine or corning liquid used on store-bought corned briskets vary greatly from brand to brand and pre-soaking in water is necessary to insure that the finished product is not too salty. When using an unfamiliar brand, play it safe and use longer soaking times. I rarely soak longer than 8 hours, but some “salt-sensitive” readers report good luck with an overnight soak-out. The flavor will mellow slightly.

FINISH TEMP NOTE: The most important part of the instructions for the final internal temperature or “finish temp” is to cook until the internal temperature is at least 165° to 170° and the pastrami is tender. Rest before serving. Remember to slice against the grain”. So…..monitor the internal.  When cooking/smoking a corned brisket, you may need to go to 180°, 190° or even 200° internal, but remember you are usually slicing pastrami thin, which helps with the tenderness.

Smoked Corned Beef... PASTRAMI!

Smoked Corned Beef… PASTRAMI!

Instructions

  1. Place corned beef brisket flat in large container and cover with cool water. Slice the potatoes in ¼” wide slices and place in the water with the corned beef. The starch from the potatoes will help pul the salt out of the corned beef. Keep container in refrigerator for 12 hours.
  2. Preheat Big Green Egg or other smoker/grill set up for indirect cooking. Bring temperature to 275⁰ and add chunks of pecan and cherry wood to hot coals for smoke.
  3. Remove brisket from water and pat dry with paper towel.
  4. Apply a thin layer of the Helga’s Gourmet mustard over the entire corned beef brisket.
  5. Apply heavy coat of the Oakridge BBQ Santa Maria Rub over the entire corned beef brisket.
  6. Place Brisket Flat on smoker and cook for 3 hours.
  7. Pour beef broth into half size aluminum food service pan. Place brisket flat on wire cooling rack in pan, insert probe thermometer and cover pan with foil.
  8. Cook until internal temperature reaches 202⁰.
  9. Remove brisket from pan and place directly on cooking grate for 15 min.
  10. Rest brisket for 20-30 minutes loosely covered with aluminum foil.
  11. Slice pastrami across grain into desired thickness.

Slice it thick or thin for whatever your favorite recipe might be using Pastrami/Corned Beef. But a thin sliced batch makes for a delicious “Irish Quesadilla”!!!!!

Irish Quesadillas

Irish Quesadillas

Naan Bread From Scratch

Naan From Scratch

Using your grill for baking is a wonderful way to add a little kick of the outdoors to some of your favorite dishes. Make sure you invest in a pizza/baking stone that has been made specifically for use on a grill at high temperatures or you may end up with a cracked stone.

This recipe for homemade Naan bread is the perfect vehicle for grilling some delicious pizzas. Since the Naan is already baked, all you need to do is add toppings and grill covered at 400 degrees! Use your imagination and go crazy with flavor!

BBQ-Chicken-Naan-Pizzas-with-Malbec-BBQ-Sauce8

INGREDIENTS:

  • 1 cup warm water
  • 2 tablespoons honey
  • 1 (.25 ounce) package active dry yeast (about 2 1/4 teaspoons)
  • 3 1/2 cups all-purpose flour
  • 1/4 cup plain yogurt
  • 2 teaspoons salt
  • 1/2 teaspoon baking powder
  • 1 egg
  • 1/4 cup (4 tablespoons) butter
  • 3 cloves garlic, minced
  • (optional topping: chopped fresh cilantro)

DIRECTIONS:

  1. Stir together warm water and honey until the honey has dissolved.
  2. Add the water mixture to the bowl of a stand mixer with the dough attachment, and sprinkle the yeast on top of the water.  Give the yeast a quick stir to mix it in with the water.  Then let it sit for 5-10 minute until the yeast is foamy.
  3. Turn the mixer onto low speed, and add gradually flour, yogurt, salt, baking powder, and egg.  Increase speed to medium-low, and continue mixing the dough for 2-3 minutes, or until the dough is smooth.  (The dough will still be slightly sticky, but should form into a ball that pulls away from the sides of the mixing bowl.)
  4. Remove dough from the mixing bowl, and use your hands to shape it into a ball.  Grease the mixing bowl (or a separate bowl) with olive oil or cooking spray, then place the dough ball back in the bowl and cover it with a damp towel.  Place in a warm location (I set mine by the sunny window) and let it rise for 1 hour until the dough has nearly doubled in size.
  5. Meanwhile, heat the butter in a small saute pan over medium heat until melted.  Add garlic and cook for 1-2 minutes until fragrant.  Then remove butter from heat, strain out and discard the garlic, leaving the infused melted butter behind.  Set aside.
  6. Once the dough is ready, transfer it to a floured work surface.  Then cut the dough into 8 separate pieces. Roll each into a ball with your hands, then place on the floured surface and use a rolling pin to roll out the dough into a large circle (or oval, or whatever shape it takes) until the dough is a little less than 1/4-inch thick.  Brush dough lightly with the garlic-infused butter on both sides.
  7. Set your grill up for indirect cooking using a grill safe pizza stone. When the internal temperature of your grill is around 400 degrees, place the stone inside to preheat.  Add a piece of the rolled-out dough to the stone and cook for 1 minute, or until the dough begins to bubble and the bottom turns lightly golden.  Flip the dough and cook on the second side for 30-60 seconds, or until the bottom is golden.  Then transfer the naan to a separate plate, and cover with a towel.  Repeat with remaining dough until all of the naan pieces are cooked.
  8. Keep the naan covered with the towel until ready to serve, so that it doesn’t dry out.  Serve sprinkled with fresh cilantro, if desired.

Grilled Sausage and Cheese Balls

This recipe is one of the tastiest appetizers you can cook up on your grill for your next tailgate or watch party. Replace the Italian sausage with ground beef, pork, chicken, or turkey and jack up the flavor with your favorite BBQ seasoning like Oakridge BBQ Santa Maria, EAT Zero to Hero, or Fast Eddy’s All Purpose rub. You can also substitute a variety of cheese.

grillsausagecheeseballs


Ingredients

1 lb Italian sausage
3 cups biscuit mix
1 egg, lightly beaten
2 tsp minced garlic
4 cups shredded sharp Cheddar cheese
1⁄4 cup milk

1/4 cup of your favorite BBQ seasoning or rub

Instructions
Set your grill/smoker for indirect cooking at 350°F/177°C.

Combine all ingredients in a large glass mixing bowl. Use your hands to mix the ingredients together.

Form the mixture into balls, approximately 1” in size, and place on a BBQ Butler silicone mesh grill mat.

Place the meatballs directly onto the grill grate of your smoker or grill. For best indirect results, use the Big Green Egg with plate setter, Good One cooking chamber, or Weber Smokey Mountain.

Cook for 15-20 minutes.

Makes 60 servings

The Science of Turkey by Chris Marks of Good One Smokers & Three Little Pigs BBQ

The Science of Cooking Turkey
2-20-lbs-turkey-on-good-one


Have you ever cooked a perfect turkey? Were the breasts moist and tender and the leg completely cooked? Chances are, not always. Why is it so hard to get the dark meat cooked perfectly without over cooking the white meat? The reason is that a turkey is actually two distinctly different kinds of meat. The breast meat is very different from the leg, thigh and wing meat. This can create a real challenge when it comes to cooking the perfect bird.

The make-up of a turkey

At the biochemical level a turkey is a combination of approximately 3 parts water to one part fat and one part protein. The majority of meat comes from muscle fibers in the turkey, which are mostly proteins – notably myosin and actin. Because turkeys rarely fly but rather walk, they contain far more fat in their legs than in their breast, which results in the strong differences in texture between these sections of the bird – and the difficulty in making sure that all portions of the bird are properly heated. The science of cooking a turkey: As you cook the turkey, muscle fibers contract until they begin to break up at around 165 degrees Fahrenheit. Bonds within the molecules begin to break down, causing proteins to unravel, and the dense muscle meat to become more tender. Collagen in the bird (one of three protein fibers that attach muscles to the bone) breaks down into softer gelatin molecules as it unwinds. The dryness of a turkey is a result of muscle proteins coagulating within the meat, which can result if it is cooked too long. Temperature differentials in cooking a turkey: Part of the problem, as described above, is that the different nature of the light and dark meat in a turkey results in different rates to reach the coagulation of the muscle proteins. If you cook it too long, the breast meat has coagulated; if you don’t cook the bird long enough, the dark meat is still tough and chewy. Harold McGee, a food science writer, indicates aiming for 155 – 160 degrees Fahrenheit in the breast), but you want 180 degrees or above in the leg.

White Turkey Meat

White meat is found in the breast and wing muscles of a turkey.  Turkey can fly, but it is not their main mode of locomotion. Turkeys use their wing muscles when they need a burst of speed to escape predators. These muscles produce a lot of power, but they fatigue quickly.  Turkey breast and wing muscles consist mainly of white muscle fibers. These fibers contract quickly and split ATP at a fast pace, though they become exhausted quickly, too.  White fibers are powered by anaerobic respiration so a turkey can move quickly even though its muscles may have exhausted the available oxygen. The tissue contains a large amount of glycogen, which can be used as fast energy source.

Dark Turkey Meat

Turkey legs and thighs are dark meat. Turkey spends a lot of time walking on the ground. Their leg muscles are adapted for regular, continuous use.  Leg and thigh muscles consist primarily of red muscle fibers. These fibers contract slowly and split ATP for energy at a relatively low rate.  Red muscle fibers rely on aerobic respiration. The protein uses oxygen to relax/contract so this tissue is rich in capillaries, which give it a deep color and rich flavor. Dark meat contains a lot of myoglobin and is rich in mitochondria, which produce energy for the muscle tissue.
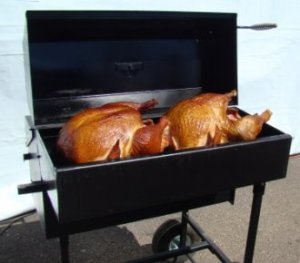
Smoked Turkey

Smoked turkey has a different color and texture than oven roasted turkey. The meat may appear pink and have a smoother texture. This is normal. The smoking process causes a chemical change in turkey that changes the color of the flesh. As long as the turkey registers a temperature of 165 degrees F. it is safe to eat no matter the color.

This requires a cooking time: At 235 degrees F your turkey will take 30 to 35 minutes per pound. At 250 degrees F your turkey will take 25 to 30 minutes per pound. At 275 degrees F your turkey will take 20 to 25 minutes per pound.

I really do not recommend stuffing your turkey for smoking. This increases the cooking time (about 5 minutes a pound) and puts a lot of food in contact with potential bacteria. For smoking, it is best that your turkey is able to cook from the inside as well as the out.

Brining: I like to use a simple salt/sugar brine recipe to enhance:

Brine whole turkeys for at least 6-12 hours.

1 turkey (12 to 17 lbs.)

Cold water- 2 gallons

Salt/Sugar- 1 cup each

1 turkey (18-24 lbs.)

Cold water- 3 gallons

Salt/Sugar- 1 1/2 cups each

1 bone-in turkey breast (6 to 8lb) Brine for 3-6 hours

Cold water- 1 gallon

Salt/Sugar- 1/2 cup

Keep the chicken cold while you brine it! It should be in the fridge or in a cooler, or at the very least in a tub of cold water. You can add ice to the water to make sure it stays cold.

Before the turkey goes in the smoker you will want to add some flavor to the bird. This is best done with a spice rub. I use Three Little Pig’s Touch of Cherry Rub or Championship rub on the Turkey after I rub it down with Olive Oil first.

With the smoker hot and the bird on the cooking grate, it is time to build up a good dose of smoke. Meat absorbs more smoke early on during the cooking process than it does later, so now is the time to get the smoke going.

Any wood (except maybe mesquite) is a good choice for your smoke. I like a mixture of hickory and cherry. This gives a strong smoke flavor from the hickory and a sweet flavor from the cherry wood. Of course, whatever you like is the way to go.

Look for the center of the breast and push the meat thermometer into it, but avoid getting it on the bone. Bone heats faster than meat and will give you a false reading. Next, check the thigh between the leg and the body. Now do the same thing on the other side. The lowest reading is the one you use. You are looking for a temperature between 165 (Breast) and 170 degrees F (Thighs).

Sweet Potato Skins With Pulled Pork and rQ Ivory Slaw

This is an awesome take on the ultimate bar food… Potato Skins! The tender sweet potato makes the perfect vessel for some delicious pulled pork, smoked cheddar cheese and a side of creamy BBQ flavored slaw.

sweet-potato-skins


Ingredients:

1 lb. Pulled Pork chopped in bite size chunks w/BBQ sauce mixed in

½ cup of a BBQ Sauce with a nice vinegar bite(EAT IPO works well)

4-6 medium size sweet potatoes, not too large since we’re using them for skins. Think single serving size when sliced in half lengthwise.

1 cup shredded smoked cheddar cheese

1 package apple smoked bacon

Oakridge BBQ Secret Weapon rub for seasoning

SLAW:

1 bag slaw mix

½ cup rQ Ivory BBQ Sauce

2 tbls. Nakano Garlic Infused Rice Wine Vinegar

½ cup finely chopped Sweet Red Pepper

Directions:

  1. Either par-boil or pre-bake your sweet potatoes. Make sure they’re NOT over cooked. Let them rest and come to room temperature.
  2. Slice the sweet potatoes in half lengthwise and scoop out the insides leaving a good ¼ inch of flesh inside the skins.
  3. Apply a light dusting of your favorite BBQ rub to the inside of the skins.
  4. Mix in ½ cup of BBQ sauce(EAT IPO) with the pulled pork.
  5. Spoon the pork into the sweet potato skins and top with shredded smoked cheddar cheese.
  6. Arrange the skins inside a foil pan and put into your grill/smoker using indirect heat at about 300 degrees for about 15-20 minutes. Do NOT place the pan over direct heat… you don’t want the bottoms of the skins to get burnt.
  7. Take the skins out of the grill/smoker and apply a spoonful of the rQ slaw mix on top, lightly dust with BBQ rub and serve. Or, serve the slaw on the side and sprinkle bacon bits on top.

Smoked Cream Cheese & Jalapeno Pinwheels

This is a delicious and gorgeous crowd pleaser that hits home with perfectly smoked cream cheese. The recipe was developed by 2015 Food Network Chopped Grill Master Stan Hays of County Line Smokers. And, it’s really easy to pull off! The pinwheels are best when refrigerated before slicing. For a little more flavor, dust the sliced pinwheels lightly with a great BBQ rub like Oakridge BBQ Competition Beef & Pork rub!

The smoked cream cheese is the bomb it is great on a cracker by itself.

smoked-cream-cheese-pinwheels-copy


Stan Hays talking BBQ at Hot Spot Pools, Hot Tubs & BBQ Tailgating Class.

stan-class-banner


Ingredients:

1 pkg Your favorite wrap I like the Sun Dried Tomato
2 pkgs Cream Cheese
2-3 Jalapenos
1 Sweet Onion
1 tbsp Roasted Minced Garlic (two cloves minced)
3-4 strips Bacon
Salt and Pepper
Olive Oil
Optional – add a couple dashes of chipotle sauce, add scallions and/or your favorite bbq rub.

Directions:

Smoke the cream cheese start with cold cream cheese right out of the fridge (I like fruit wood apple or peach) and smoke (I put the cream cheese in a half and put a pan of ice under it in another pan. Using a cast iron pan add the strips of bacon to the pan. Turn the cream cheese every few minutes to get smoke on all sides of the blocks. The cream cheese should be getting a little darker. Make sure you add or keep adding your wood chips for the additional smoke. Slice the onion into thin slices put on grill with a little olive oil and char the onions. Core and half the jalapenos and grill the jalapenos until soft. Remove the bacon from the pan. Chop the onion and jalapeno and add it to the cast iron pan. Pull out the jalapenos and onions from the sautéed vegetables and mix with the chopped bacon it into the smoked cream cheese. Add salt and or pepper to taste. Let set and mix several times to get the flavors throughout the cream cheese. Smear on to the wraps and then refrigerate for best results let sit overnight then cut into half inch pinwheels. The ends are what we call the chefs snacks.

BBQ Italian Style Onion Bombs

onion-bomb-07-480

This recipe is WAY too much fun and absolutely delicious! You basically end up with a grilled onion filled with an italian sausage meatball wrapped in bacon and glazed with BBQ sauce! It really doesn’t get any better for a great tailgate item or backyard BBQ!

INGREDIENTS

  • 2 large sweet onions, each 9 to 10 ounces
  • 1 ½ lbs. Sweet Italian sausage
  • 2 cloves garlic, minced
  • 1 large egg, beaten with a fork
  • 1/2 cup dry bread crumbs
  • 1/2 cup grated Parmesan cheese
  • 1 1/2 tablespoons chopped fresh basil
  • 1 1/2 tsp John Henry Mojave Garlic Pepper
  • 18 slices thin bacon
  • Your favorite barbecue sauce

Step 1: Slice the root and stem ends off the onions. Cut each onion in half lengthwise and remove the papery outer skin and any blemished layers. Separate the onions into layers, keeping the matched pairs together. Reserve the three largest pairs from each onion. Save the remaining onion for another use.

onion-bomb-01-480

Step 2: In a large mixing bowl, gently combine the ground beef, sausage, garlic, egg, bread crumbs, Parmesan, fresh herbs, Mojave Garlic Pepper

Step 3: Assemble the onion bombs: Place two matching onion layers on your work surface, rounded side down. Mound a portion of the meat mixture (3 to 4 ounces, depending on the size of the onion) in one half. Top with the matching half. (The meat should fill the rejoined onion halves.) Wrap each onion bomb in three slices of bacon, securing with toothpicks. Repeat until you have six onion bombs.

onion-bomb-03-480

Step 4: Set your grill or smoker up for indirect cooking at 350 degrees. Place the bombs directly on the grill surface and cook through until bacon crisps up and internal temp on the meat is at least 165 degrees.

Step 5 Optional: Baste the bombs with your favorite BBQ sauce and let carmelize before serving.

Bacon Wrapped Pineapple With Burnt Finger Smokey Kansas City Spicy Honey Glaze

Bacon Wrapped Pineapple With Burnt Finger Smokey Kansas City Spicy Honey Glaze

This is a crowd favorite created by none other than 2015 Food Network Chopped Grill Master Champion Stan Hays of County Line Smokers. Who doesn’t like bacon and pineapple then glazed with some spicy sweetness?

stan-2


Ingredients:

1 Whole Pineapple

1 Package thick sliced low sodium bacon

1 bottle honey

1 bottle Smokey Kansas City Spicy BBQ Sauce from Burnt Finger BBQ

1 Package Oakridge BBQ Dominator Sweet Rub

OPTION:  Add grilled jalapenos or cerrano chili strips to the inside of the bacon when wrapping for an extra Kick!

 stan-1


Directions:

Core the pineapple and cut into 1 1/2 inch chunks. Cut bacon in half. Dust the pineapple chunks with the Oakridge BBQ Dominator sweet rub. Use a half piece of bacon wrap it around the pineapple chunks and use a tooth pick to hold it in place. Dust the outside of the bacon wrapped pineapple chunks with Oakridge BBQ Dominator Sweet seasoning. Put in fridge while you make the glaze.

For tailgating, use a foil loaf pan to heat up one cup of the Smokey Kansas City Spicy BBQ sauce from Burnt Finger BBQ with two tablespoons of honey. This will be the glaze applied to the bacon wrapped pineapple chunks at the end of grilling.

Set up your grill for direct grilling over medium high heat. Or grill indirect over high heat to make sure the bacon gets crispy. Grill the pineapple chunks until the bacon is crispy on the outside and finish by glazing them with the Smokey Kansas City Spicy Honey glaze.

Bacon Wrapped Smoked Pork Tenderloin Sliders with Grilled Pineapple & Red Onions

At a recent class featuring Stan Hays from County Line Smokers, Operation BBQ Relief and The Food Network’s 2015 Chopped Grill Masters, we focused the entire class on Tailgating. This bacon wrapped smoked tenderloin used to make sliders was a delicious hit. Simple and easy enough to make on site at a tailgate party. Super flavors combining sweet, spicy and porkalicious!

pork-tender-2


Ingredients:

Pork tenderloins

Bacon

Sliced pineapples

Smoke On Wheels Pork Marinade & Injection

Tim & Todd’s Excellent BBQ Sauce

Grilled red onions glazed with Tim & Todd’s

Oakridge BBQ Competition Beef & Pork Rub

Slider Pretzel Rolls

pork-tenders-1


Marinate pork tenderloins and sliced red onions in Smoke On Wheels Pork Marinade overnight. Remove tenderloins from marinade and dust generously with Oakridge BBQ Competition Beef & Pork Rub.

After the tenderloins have been dusted, wrap them each with a slice of bacon and dust the bacon lightly with the Oakridge BBQ seasoning.

Dust the pineapple slices with the Oakridge BBQ Competition BBQ seasoning.

Set The Big Green Egg for indirect cooking using the ConvEGGtor(plate setter) at 275 degrees and place the tenderloins in the center of the grill. Turn after 20 minutes and cook through until the internal temperature of the tenderloins is at 140 degrees.

Grill the pineapple slices and baste each side with Tim & Todd’s Sauce. Grill the red onions in the grill wok basket.

*The bacon can be crisped up if needed by finishing over high, direct heat. This recipe was developed and used in competition about 25 years ago when pork tenderloins were legal to use in Kansas City BBQ Society sanctioned events.

Let the tenderloins rest for 15 minutes and slice into medallions. Assemble into sliders using the Pretzel bread slider rolls.

pork-tender-3


Pancetta and Rosemary Turkey Breast with Roasted Potatoes and Apple Relish

Ingredients

  • 1 boneless turkey breast half (with skin), about 3 pounds, butterflied
  • 1 tablespoon plus 2 teaspoons finely chopped fresh rosemary leaves, divided
  • 1 tablespoon finely chopped fresh sage leaves
  • 2 teaspoons finely grated lemon zest
  • 2 large garlic cloves, minced or pushed through a press
  • Kosher salt
  • Freshly ground black pepper
  • 4 ounces pancetta, thinly sliced
  • 1 tablespoon unsalted butter, melted

Relish

  • Vegetable oil
  • 1 tablespoon finely chopped fresh sage leaves
  • ½ large yellow onion, cut into ½-inch dice (about 1 cup)
  • 2 sweet-tart apples, such as Pink Lady or Jazz, each about 8 ounces, unpeeled, cored, and cut into ½-inch dice (about 3 generous cups)
  • 2 ribs celery, finely sliced (about 1 cup)
  • ½ cup water
  • 3 tablespoons fresh lemon juice
  • 2 tablespoons honey
  • 1 teaspoon cider vinegar
  • 2 pounds new red potatoes, about 1½ inches in diameter, each cut in half

pancetta-chicken-breast


Instructions

  1. Place the butterflied turkey breast, skin side down, between two large sheets of plastic wrap, and pound to an even ½-inch thickness (the size of the turkey breast will be approximately 12 by 11 inches).
  2. In a small bowl combine 1 tablespoon of the rosemary, the sage, lemon zest, garlic, ½ teaspoon salt, and ¼ teaspoon pepper. Sprinkle the mixture evenly over the turkey breast, and then roll up the turkey breast lengthwise to create a cylinder. Cover with the pancetta slices, overlapping them slightly, and then tie the cylinder with butcher’s twine at 2-inch intervals to secure the pancetta and maintain its shape. Brush the outside all over with the melted butter. Season evenly with 1 teaspoon of the rosemary, ¾ teaspoon salt, and ½ teaspoon pepper.
  3. Before you light the Weber grill, place a large disposable foil pan underneath the cooking grate to catch the pancetta drippings. Prepare the Weber grill for direct and indirect cooking over medium heat (350° to 450°F).
  4. Brush the cooking grates clean. Center the turkey over the foil pan and grill over indirect medium heat, with the lid closed, until an instant-read thermometer inserted into the thickest part of the breast registers 160° to 165°F, about 1 hour 20 minutes, turning two or three times. Meanwhile, make the apple relish.
  5. In a medium skillet over medium heat, warm 1 tablespoon oil. Add the sage and swirl to release its fragrance, 20 to 30 seconds. Add the onion and cook until tender, about 5 minutes, stirring frequently. Add the apples and celery and cook for 2 minutes more, stirring occasionally. Add the water, lemon juice, honey, vinegar, ¼ teaspoon salt, and ⅛ teaspoon pepper. Bring to a simmer, cover, and cook until the apples are no longer crunchy but are still slightly firm to bite, about 3 minutes. Remove from the heat and cool to room temperature.
  6. After the turkey has cooked for about 40 minutes, place a perforated grill pan on the cooking grates over direct medium heat and preheat for 10 minutes. Put the potatoes in a medium bowl and toss with 2 teaspoons oil, the remaining 1 teaspoon rosemary, 1 teaspoon salt, and ½ teaspoon pepper. Spread the potatoes in a single layer on the grill pan and grill over direct medium heat until browned in spots and tender, 20 to 25 minutes, turning occasionally.
  7. Transfer the turkey to a cutting board and let rest for 10 minutes. Remove the twine and cut the turkey crosswise into ½-inch slices. Serve warm with the potatoes and the relish.